Reinstalling a pole saw chain is a straightforward DIY fix that can be accomplished quickly with the right approach and a little patience. The process involves disconnecting the power, gathering safety gear, accessing the sprocket and guide bar, loosening the chain tensioner, cleaning the area, orienting the chain correctly, positioning it on the guide bar and sprocket, reattaching the guide bar, loosely reinstalling the side cover, adjusting chain tension, fully tightening the side cover, and performing final checks and lubrication. This guide will walk you through each step, ensuring you understand how to reinstall your pole saw chain safely and efficiently, getting you back to trimming those high branches in no time.
Understanding Your Pole Saw Chain
At its core, a pole saw is an extended chainsaw, designed to reach high branches safely from the ground. Its cutting power comes from a rapidly rotating chain fitted around a guide bar. This chain features sharp teeth that slice through wood. For the chain to operate effectively and safely, it must be properly seated in the guide bar’s groove and maintained at the correct tension.
A pole saw chain can come off for several reasons, most commonly due to improper tension. If the chain is too loose, it can easily derail when cutting, especially if it encounters an obstruction or if the saw is angled improperly. Over time, chains can also stretch, leading to slack and increasing the likelihood of derailing. Regular maintenance and correct reinstallation are key to preventing these interruptions. For reviews buying guides on this site.
Safety First: Essential Preparations
Before you even think about touching your pole saw, prioritize safety. This isn’t just a recommendation; it’s a critical step to prevent injury.
First, disconnect the power source. For electric pole saws, unplug the cord. If it’s a cordless model, remove the battery. For gas-powered units, turn off the engine and, for added safety, disconnect the spark plug wire. This ensures the saw cannot accidentally start while your hands are near the cutting components. Always allow the saw to cool down completely if it’s been recently used, as components can be hot.
Next, gather your personal protective equipment (PPE). You’ll need sturdy work gloves to protect your hands from the sharp chain teeth. Eye protection, such as safety goggles or a face shield, is also highly recommended to guard against any debris. A hard hat and sturdy work boots are good practice for any tree-trimming task. Loose clothing or jewelry should be avoided as they can get caught in the machinery.
With your pole saw secured and your safety gear in place, you’re ready to begin the reinstallation process.
Step-by-Step Guide to Reinstalling Your Pole Saw Chain
Reinstalling a pole saw chain follows a consistent process, regardless of whether your saw is electric, battery-powered, or gas-driven. The key is methodical execution.
Step 1: Access the Sprocket and Guide Bar
|
Our Picks for the Best Pole Saw in 2026
As an Amazon Associate I earn from qualifying purchases.
|
||
| Num | Product | Action |
|---|---|---|
| 1 | Pole Saw Bag Compatible with Dewalt/Worx/Greenworks/EGO Power+/Black+Decker Electric Telescoping Chainsaw, Cordless Power Saw Storage Case for Extension Tree Trimmer Attachment, Black&Yellow |

|
| 2 | Kerlista Replacement Pole saw Attachment compatible with Weed Eater Snapper dewalt Craftsman Ryobi John Deere Worx Troy-Bilt and Homelite multi-tool Hus 28LD Power head Black |
|
| 3 | SEESII 10-Inch 2-in-1 Cordless Pole Saw & Mini Chainsaw, 21V Battery Powered Brushless Electric Tree Trimmer with Extension Pole, 2×4000mAh Batteries, Automatic Oiling,Handheld Pruner |
|
| 4 | Pole Saw Attachment + Extension Pole Attachment Compatible with 125LDx 128DJx 128LDx 323LD 324LDx 325LDx 326LDx and 327LDx power head or trimmer head Silvery PA1100 575261201 |
|
| 5 | 36FT Pole Saw, Telescoping Tree Trimmer with 7-30FT Extension Pole, Manual Branches Pruner for Backyard, Blue |
|
| 6 | 12-Inch Chain, Pole Saw Attachment - Compatible with Weed Eater Snapper Craftsman Ryobi WORX Troy-Bilt, and Homelite Multi-Tool Hus 128LD |
|
| 7 | Fiskars 15" Replacement Saw Blade, Woodzig Chainsaw Tooth, Compatible Models 9300/9261/TP45, Silver |
|
| 8 | Kerlista Replace part Pole saw attachment + Extension Pole Attachment compatible with Hus 128LD most brushcutters head and Powerheads (Black) |
|
| 9 | Electric 2-in-1 Cordless Pole Saw & 6" Chainsaw, Brushless Pruning Saw with 3.0Ah Battery, 15-Foot Reach Extendable Tree Trimmer for High Branch Pruning & Limb Cutting |
|
| 10 | Greenworks 8-Inch 40V Pole Saw Attachment PS40A00 |
|
Your first task is to remove the side cover, which protects the drive sprocket and secures the guide bar. Depending on your pole saw model, this usually involves loosening and removing one or two bolts or a tensioning knob using a hex key or a flathead screwdriver. Once loosened, carefully remove the cover to expose the sprocket, guide bar, and the area where the chain sits.
Step 2: Loosen Chain Tensioner
Before placing the chain, you need to ensure the guide bar has enough play for easy installation. Locate the chain tensioning screw, typically found near the base of the guide bar assembly. Using the appropriate tool (often a flathead screwdriver or part of your hex key), turn the tensioning screw counter-clockwise a few turns. This will retract the tensioner pin, creating space for the chain and bar.
Step 3: Clean the Area and Orient the Chain
This is an excellent opportunity to clean out any sawdust, wood chips, or debris that has accumulated around the sprocket, guide bar, and within the cover. A clean machine operates more efficiently.
Now, take your chain and lay it out in a loop, ensuring there are no twists or kinks. A crucial step is to correctly identify the chain’s direction. The sharp cutting teeth should always face away from the motor and towards the tip of the guide bar, in the direction of the chain’s rotation. If they’re pointing the wrong way, simply flip the chain over.
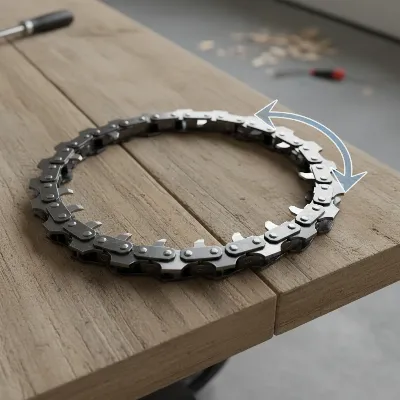 Pole saw chain laid out, showing the correct direction of cutting teeth towards the guide bar tip
Step 4: Position the Chain on the Guide Bar and Sprocket
Carefully place the drive links of the chain into the groove that runs along the edge of the guide bar. Work your way around the bar, creating a loop. Once the majority of the chain is seated in the bar’s groove, guide the excess chain around the drive sprocket, which is the toothed wheel that powers the chain. Ensure the chain fits snugly around the sprocket.
Step 5: Reattach the Guide Bar
With the chain positioned on both the bar and the sprocket, carefully slide the guide bar assembly back onto the mounting bolts. As you do this, ensure that the chain tensioner pin, which you loosened earlier, aligns and inserts into the small hole on the tail end of the guide bar. This pin is essential for proper chain tensioning. If you encounter resistance, slightly adjust the tensioning screw or the bar’s position until it slides into place.
Step 6: Reinstall the Side Cover (Loosely)
Place the side cover back over the guide bar and sprocket area. Insert the bolt(s) or tighten the knob, but only hand-tighten it enough to hold the cover in place. Do not fully tighten it yet, as you will need some play to adjust the chain tension.
Step 7: Adjust Chain Tension
This is arguably the most critical step for optimal performance and safety. While holding the tip of the guide bar up slightly (this helps ensure even tension), turn the chain tensioning screw clockwise. As you do this, you’ll see the guide bar move outward, taking slack out of the chain.
The goal is to achieve proper tension: the chain should be snug against the guide bar, with no significant sag on the underside, but still loose enough that you can pull it slightly away from the bar (typically about 1/8 to 1/4 inch, or barely enough to see the drive links in the groove). You should also be able to move the chain freely by hand around the bar without it binding.
A common issue is overtightening, which can lead to rapid chain wear, guide bar damage, and strain on your pole saw’s motor. Under-tightening can cause the chain to derail again during operation. Always refer to your pole saw’s manual for specific tensioning guidelines if you’re unsure.
Step 8: Fully Tighten the Side Cover
Once you’re satisfied with the chain tension, firmly tighten the side cover bolt(s) or knob. This locks the guide bar in place and maintains the tension you just set. Give the chain another manual spin to confirm it still moves freely without binding.
Step 9: Final Checks and Lubrication
Before powering up your pole saw, do one last visual inspection. Ensure all components are securely in place, the chain is correctly seated, and the tension feels right. Also, check the bar and chain oil reservoir and top it off if needed. Proper lubrication is vital for reducing friction, heat, and wear on both the chain and the guide bar.
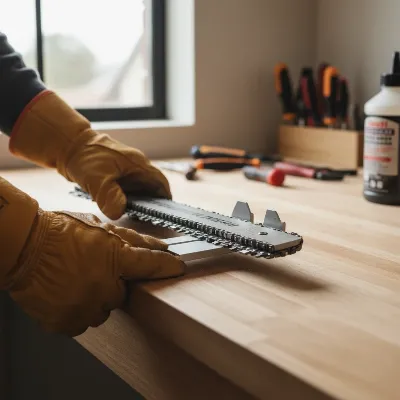 A person wearing gloves checking the tension of a pole saw chain on a guide bar.
Maintaining Optimal Chain Tension
Keeping your pole saw chain at optimal tension isn’t a one-time fix; it’s an ongoing maintenance task. Chains, especially new ones, will stretch with use. It’s wise to check your chain tension frequently, particularly during the first hour of operation, and readjust as necessary. A correctly tensioned chain not only improves cutting performance but significantly enhances safety by reducing the risk of the chain jumping off the bar.
Troubleshooting Common Issues
Even with careful reinstallation, you might encounter issues. If the chain frequently derails, re-check your tension. It might be too loose or, less commonly, too tight. Inspect the guide bar for any wear, burrs, or damage to the groove that might be preventing the chain from seating correctly. The drive sprocket should also be examined for excessive wear; a worn sprocket might not properly engage the chain links. Sometimes, an older, stretched chain simply needs to be replaced.
Conclusion
A dislodged pole saw chain doesn’t have to put an end to your yard work. With this quick DIY guide, you now have the knowledge and confidence to efficiently put a chain back on your pole saw. safety is paramount, so always disconnect power and wear appropriate PPE. By following these steps for cleaning, orienting, installing, and tensioning your chain, you’ll ensure your pole saw is ready to tackle those hard-to-reach branches, maintaining a neat and tidy garden with minimal downtime.
What common pole saw chain issues have you encountered, and how did you resolve them?
Frequently Asked Questions
How tight should a pole saw chain be?
A pole saw chain should be snug against the guide bar without any noticeable sag on the underside. You should be able to pull it gently away from the bar about 1/8 to 1/4 inch, and it should move freely by hand without binding. Over-tightening can cause premature wear and strain on the motor.
Why does my pole saw chain keep falling off?
The most common reason for a pole saw chain to fall off is improper tension – it’s usually too loose. Other factors can include a worn-out or stretched chain, a damaged guide bar groove, or a worn drive sprocket. Always ensure correct tension and inspect components for wear.
Can I use any chain on my pole saw?
No, you must use a replacement chain that matches your pole saw’s specifications, including the chain pitch, gauge, and drive link count. These details are typically found in your pole saw’s manual or printed on the guide bar. Using the wrong size chain can cause damage or be unsafe.
What tools do I need to put a chain back on a pole saw?
You will typically need a hex key (often provided with your pole saw) or a wrench to remove the side cover bolts, and a flathead screwdriver for adjusting the chain tensioning screw. Safety gloves are essential for protecting your hands during the process.
How often should I check my pole saw chain tension?
It’s recommended to check your pole saw chain tension before each use and periodically during extended operation, especially for new chains as they tend to stretch. Re-tension the chain whenever you notice it sagging or feeling loose on the guide bar.
Frequently Asked Questions
How tight should a pole saw chain be for optimal performance?
A pole saw chain should be snug against the guide bar, allowing you to pull it gently away by about 1/8 to 1/4 inch. It should also move freely by hand without binding. Over-tightening can lead to premature wear and strain on the motor.
What are the main reasons a pole saw chain keeps falling off?
The most common reason for a pole saw chain to fall off is improper tension, typically being too loose. Other contributing factors include a worn-out or stretched chain, a damaged guide bar groove, or a worn drive sprocket. Regular inspection and correct tensioning are crucial.
Can I use any type of chain as a replacement on my pole saw?
No, you must use a replacement chain that precisely matches your pole saw's specifications. This includes the correct chain pitch, gauge, and drive link count. These details are usually found in your pole saw's manual or printed on the guide bar; using the wrong size can be unsafe and cause damage.
What essential tools are needed to reinstall a pole saw chain?
To reinstall a pole saw chain, you will typically need a hex key or wrench to remove the side cover bolts, and a flathead screwdriver for adjusting the chain tensioning screw. Sturdy safety gloves are also essential to protect your hands from the sharp chain teeth during the process.
How frequently should I check the tension of my pole saw chain?
It is recommended to check your pole saw chain tension before each use and periodically during extended operation, especially with new chains as they tend to stretch. Re-tension the chain whenever you notice it sagging or feeling loose on the guide bar to ensure safe and efficient cutting.
How to Reinstall a Pole Saw Chain
This guide provides a step-by-step process for safely and efficiently reinstalling a pole saw chain, ensuring proper tension and operation.
Remove the side cover by loosening bolts or a tensioning knob with a hex key or screwdriver. This exposes the drive sprocket, guide bar, and the area where the chain sits. Ensure the saw is unplugged or battery removed before starting.
Locate the chain tensioning screw near the guide bar's base and turn it counter-clockwise a few turns. This retracts the tensioner pin, creating necessary space for easy chain and bar installation. A flathead screwdriver is often used for this step.
Clean any sawdust or debris from around the sprocket and guide bar. Lay out the chain, ensuring no twists, and verify the cutting teeth face away from the motor towards the guide bar tip. Correct orientation is crucial for proper cutting.
Carefully place the chain's drive links into the guide bar's groove, working around the bar. Guide the excess chain around the drive sprocket, ensuring it fits snugly. This prepares the chain for tensioning and reassembly.
With the side cover loosely reinstalled, hold the guide bar tip up and turn the tensioning screw clockwise until the chain is snug but still movable by hand (1/8 to 1/4 inch play). Once tension is correct, fully tighten the side cover bolts or knob to lock the guide bar in place.

This was super helpful for getting my Greenworks pole saw back in action. I always struggled with getting the chain oriented correctly, but the detailed explanation here finally clicked for me. It took a bit longer than I expected to get the tension just right, but the final checks section was really useful for making sure everything was secure.
Fantastic guide! My old pole saw chain kept slipping off, and I was about to buy a new one. Following these instructions, particularly the emphasis on proper chain tension adjustment, saved me a lot of money. It’s great to know I can handle this DIY fix without needing a professional. My high branches are no match now!
The steps were mostly clear, especially for a beginner like me. However, I found the part about loosely reinstalling the side cover a bit vague. I ended up overtightening it initially, which made adjusting the chain tension harder. A bit more detail on that specific step would make this perfect.
I’ve always dreaded dealing with my pole saw chain, but this guide made it so much easier. The tip about cleaning the area around the sprocket and guide bar before reinstallation was a game-changer. My saw runs smoother now, and I feel way more confident tackling future chain issues myself. Definitely recommend following these steps!